How to Share Private YouTube Videos?
Sharing private YouTube videos might sound complicated at first, after all, how can you share something which is private? However, once you are done reading this post, you will find out that the steps needed to share private YouTube videos are actually quite simple. Whenever any user uploads a new video on YouTube, he/she is presented with the choice to mark the video as private, unlisted or public. If the uploader selects “public”, anyone across the globe can watch the video and search for it. If the uploader selects “unlisted”, then the video doesn’t appear in search results and it can only be viewed by viewers who have the link to the video. If the uploader selects “private”, then only the uploader and the people the uploader selects can watch the video. The key difference between private and unlisted video is that anyone with the link to the unlisted video can watch it, however, a private video can only be watched by people who have been exclusively invited by the uploader. A private video can be something you share with family and friends or it can be a video that is only for the eyes of a select group of people (such as a company presentation). Uploaders can share private Youtube videos with 50 users at the most.
Now that you know what a private Youtube video is, let’s find out how to share it.
Steps for Sharing Private YouTube Videos:
Any video that is marked private by its uploader can be shared via Google Plus, names on Google Contacts or 50 different email addresses. The contacts will receive an invitation to watch the video after they are added to the list. Unlike an unlisted video, the people who have been invited to watch the private YouTube video, will not be able to share the video with anyone else. So if you only want a selected set of people to watch your video, whether it’s a family video or a video with important work information, you should make your YouTube video private. Here are the steps to share your private YouTube videos::
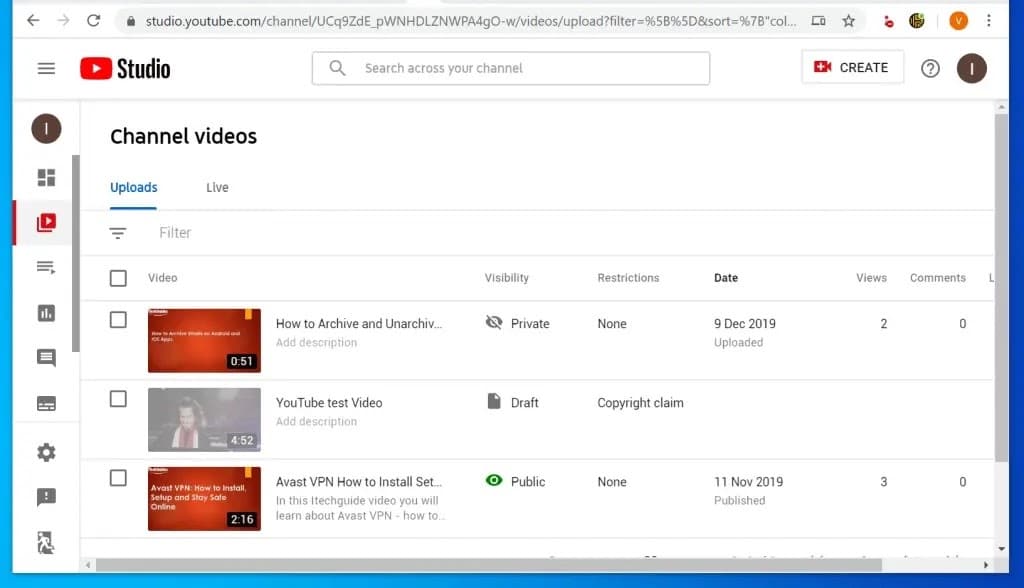
Step 1
Open YouTube Studio & then log in with the Google Account.
Step 2
Now, click the button of the Videos on the left.
Step 3
Once your Channel videos page opens, click on the private video you wish to share. And then the video will open for you to edit.
Step 4
Now, click on More, on the top right of the video editing page.
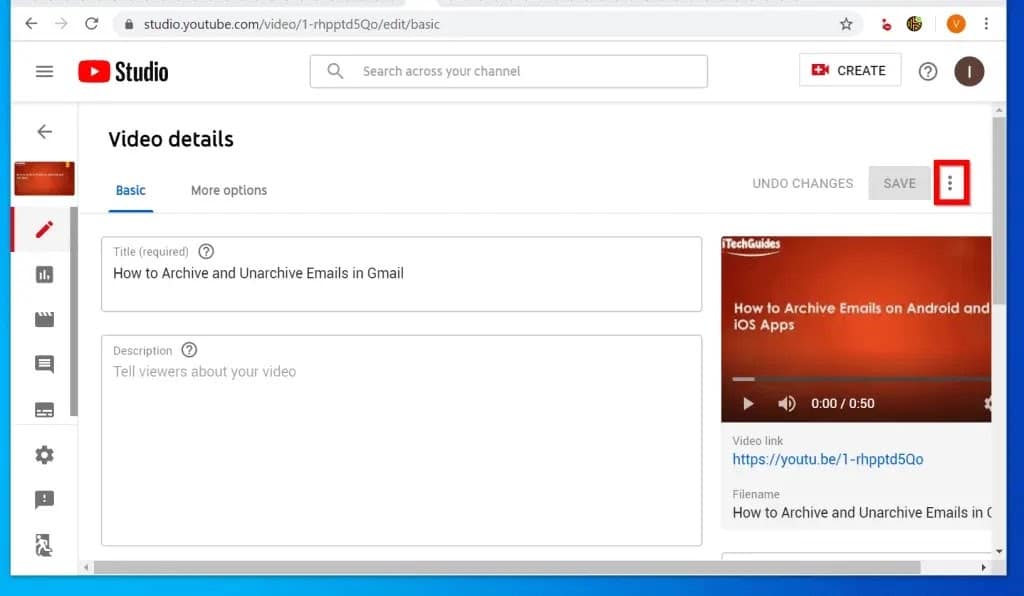
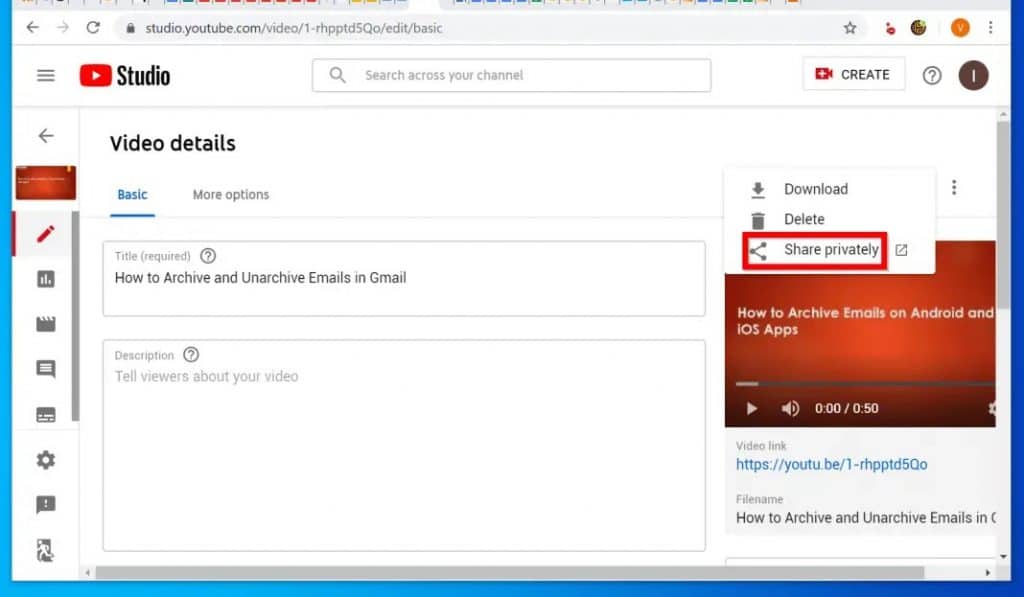
Step 5
After you click the 3 dots, there are 3 options displayed. Then select the last one, “Share privately”, in the list.
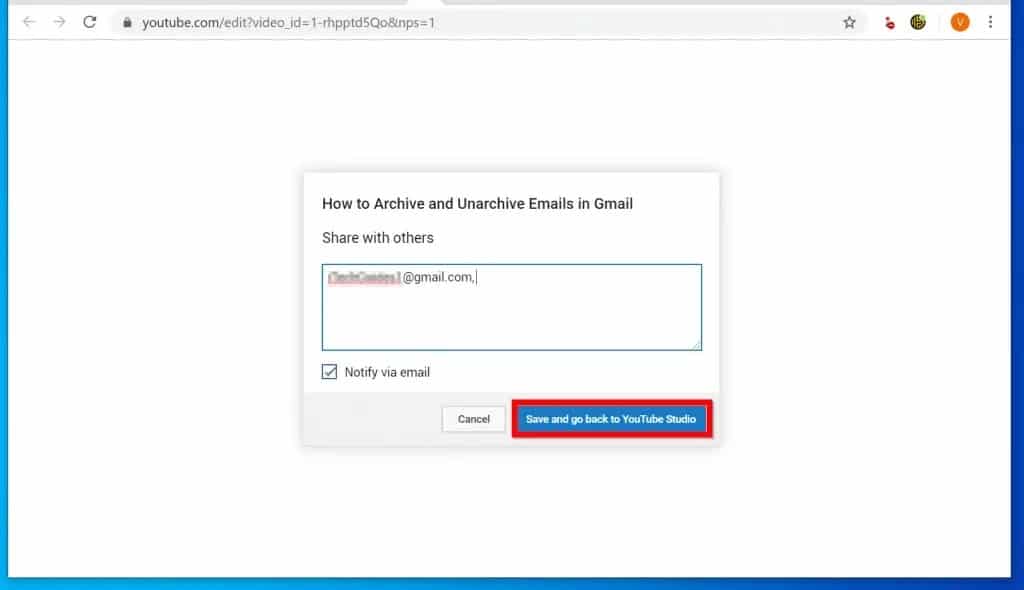
Step 6
At last, enter that email addresses you wish to share the private video with, on the Share with others box. Email addresses must be separated by commas (,). After you are done, click Save and go back to YouTube Studio.
Is it possible to change the settings of videos that have already been shared?
If you have shared a video previously that is public, you always have the option of changing the settings and limit its visibility to a handful of people. Your public video will instantaneously turn into a private video if you choose to do so and instead of the whole world watching it, only your selected group of people will be able to watch it.
In order to do so, you need to open the Video Manager and look for the video that you wish to change. Then, you need to tap on the Edit button, and a drop-down menu will open up. Here, you need to select on Private and tap on Save Changes at last.
Of course, you always have the option to change the settings again and convert your private video into a public one. All you need to do is repeat the steps mentioned above and tap on ‘Public‘ instead of ‘Private.’
What are the limitations of YouTube video sharing?
The people who you have shared the private YouTube video with, can only watch the video after clicking the URL. Also, the contacts to whom you send the private invite link need to have their own YouTube account as well. Since they need to sign in to watch the video.