
How to Create An Album On Facebook: All You Need to Know
Sharing photos is a very important part of the Facebook experience. A picture is worth a thousand words and people love sharing their life experiences through photographs on Facebook. Facebook also provides the option of creating photo albums for a better arrangement of the photos you share on the platform. The platform comes pre-loaded with some albums such as Profile Pictures, Cover Photos, Photos of You (these are the ones people have tagged you in on their own timelines) and Uploaded Photos. However, if you want to create albums that contain photos of a particular event or a particular phase of your life (friend’s wedding, college days etc.), you can do that too. In this post, we will discuss the steps you need to take in order to create an album on Facebook, both on your desktop and your phone. Let’s get started:
Creating an Album on Facebook: Steps to Follow
How to Create a Facebook Album on Desktop
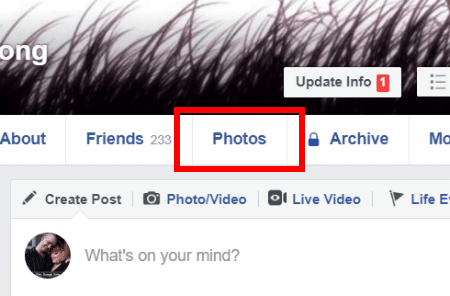
Log into Facebook, and go to your profile page. From there, select the ”Photos” button:
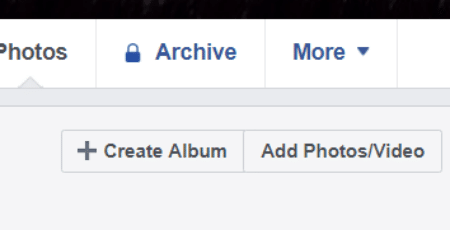
You will automatically be shown the ones your friends have tagged you in. Just above those on the right, choose ”Create Album”.
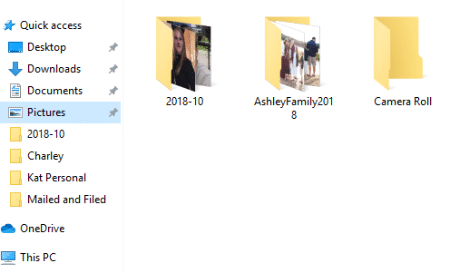
This will open a pop up window which will allow you to choose the pictures you want to create the album with. Once you upload some photos, you can go back and delete them later. But for now, just choose a few to get started.
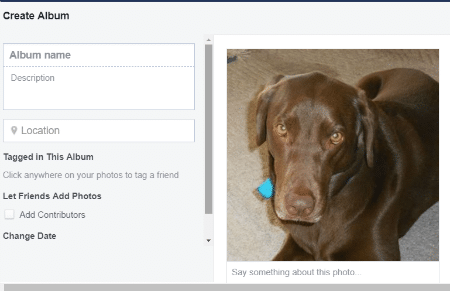
After you are done uploading the photos, you can fill more details for all the photos in the section ”Say something about this photo”. Add a short description of any names, dates, places and so forth. Now, over on the left of the screen, choose an ”Album Name”.
After that, you can add an album description if you like. Next, decide whether or not you wish to add a location to the album. For example, if your album contains pictures of your trips to the Taj Mahal, you can tag the landmark. After that you can also tag your friends, family and other people who are in the photos.
Next, you will see an option to allow your Facebook friends to add photos to that album (only that particular one). This feature is useful for albums of events such as concerts, weddings and large parties where a lot of attendees are present.
Now, choose the album date. You can leave it as the date you posted, or manually change the date to match the date of a particular event.
Before you can share your album, you need to select the people who can see it. You can make it public, where everyone in the world can see it, you can make it visible to your friends only, or you can choose to make the album only visible to yourself. Once you are done, select the ”Post” button, and you are finished.
How to Create a Facebook Album on Mobile
You can also create and share a Facebook photo album with the help of your mobile phone. In fact, it’s actually a little easier to do than it is on desktop. Head into the Facebook app and tap onto your own profile. After that, open your photos. At the top, you will see where it says ”Photo Tools” and ”Photos of You”. Scroll to the right and tap on “Albums”. You will also see the box that says “Create Album”.

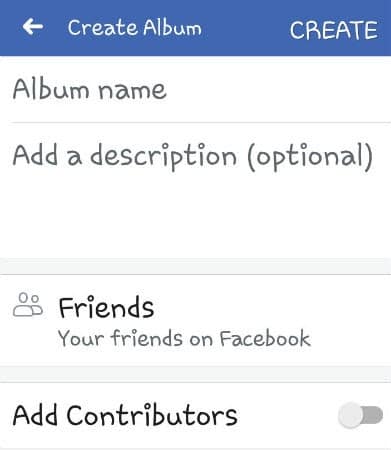
Instead of adding photos first, you will have to enter the album details first. Go ahead and name your album and give it a description. After that, choose your intended audience (friends, public, etc) and decide if you wish to allow contributors. Once you have finished these tasks, tap on the word ”Create” at the top-right of the screen.
After that’s done, you can go ahead and start adding photos. This is how the “Add Photos” section will look:

Select ”Add Photos/Videos” in the middle of the screen to start adding photos or videos. As the photos start uploading, they will start getting displayed just below those words. For each photo you upload individually, it will act as if it is a “post,” and you will be prompted to describe the photo. You’ll notice that the default album audience is already selected and cannot be changed, but you can change the target album from this screen.
After you choose the ”Post” button at the top-right of the screen, the photos will start showing up in the selected album.
Remember, if you want to delete a certain photo from the album, make sure that you select that photo specifically and delete it. If you delete the album by mistake, all the photos in the album will be deleted. There is no way to get those photos back other than manually uploading them once again.
So that was how you can create an album on Facebook. It is very easy to do on both your desktop and your phone. Hopefully, with the help of the information available in this post, you will be able to create as many albums on Facebook as you want.